
Help
1. Optional: Background Text / Cover Letter
The "Optional Background Text / Cover Letter" field provides space for additional context or introductory information related to your comment.
If you wish to provide context, explanation, or an introduction to your comment, enter this information in the field labeled "Optional Background Text / Cover Letter." This is entirely optional and is most useful when submitting multiple related comments or when additional background would help reviewers understand your feedback.
If you are only commenting on a single data class or element, you may leave this field blank.
2. Select the Data Class
To specify which data class your comment addresses:
- In the "Data Class" drop-down menu, select the appropriate data class you want to comment on.
- If you are providing a general comment that is not specific to a data element, select "General" from the options. Comments with this designation will be displayed on the USCDI landing page.
- Note that the Data Class field will automatically populate based on your current location in the platform:
- If you are on a data class page, the field will be set to that specific data class
- If you are on a data element page, the corresponding data class will be pre-selected
3. Select the Data Element
To specify which data element your comment addresses:
- In the "Data Element" drop-down menu, select the specific data element you want to comment on.
- The drop-down menu will display only the elements available under the data class you selected in the previous step.
- You can use the search function within the drop-down to quickly locate a specific data element.
- If you are commenting on the data class itself rather than a specific element, you may leave this field blank.
Note: Comments on a specific data element will appear on the respective data element page, while comments on a data class (without a specific element selected) will appear on the landing page for that data class.
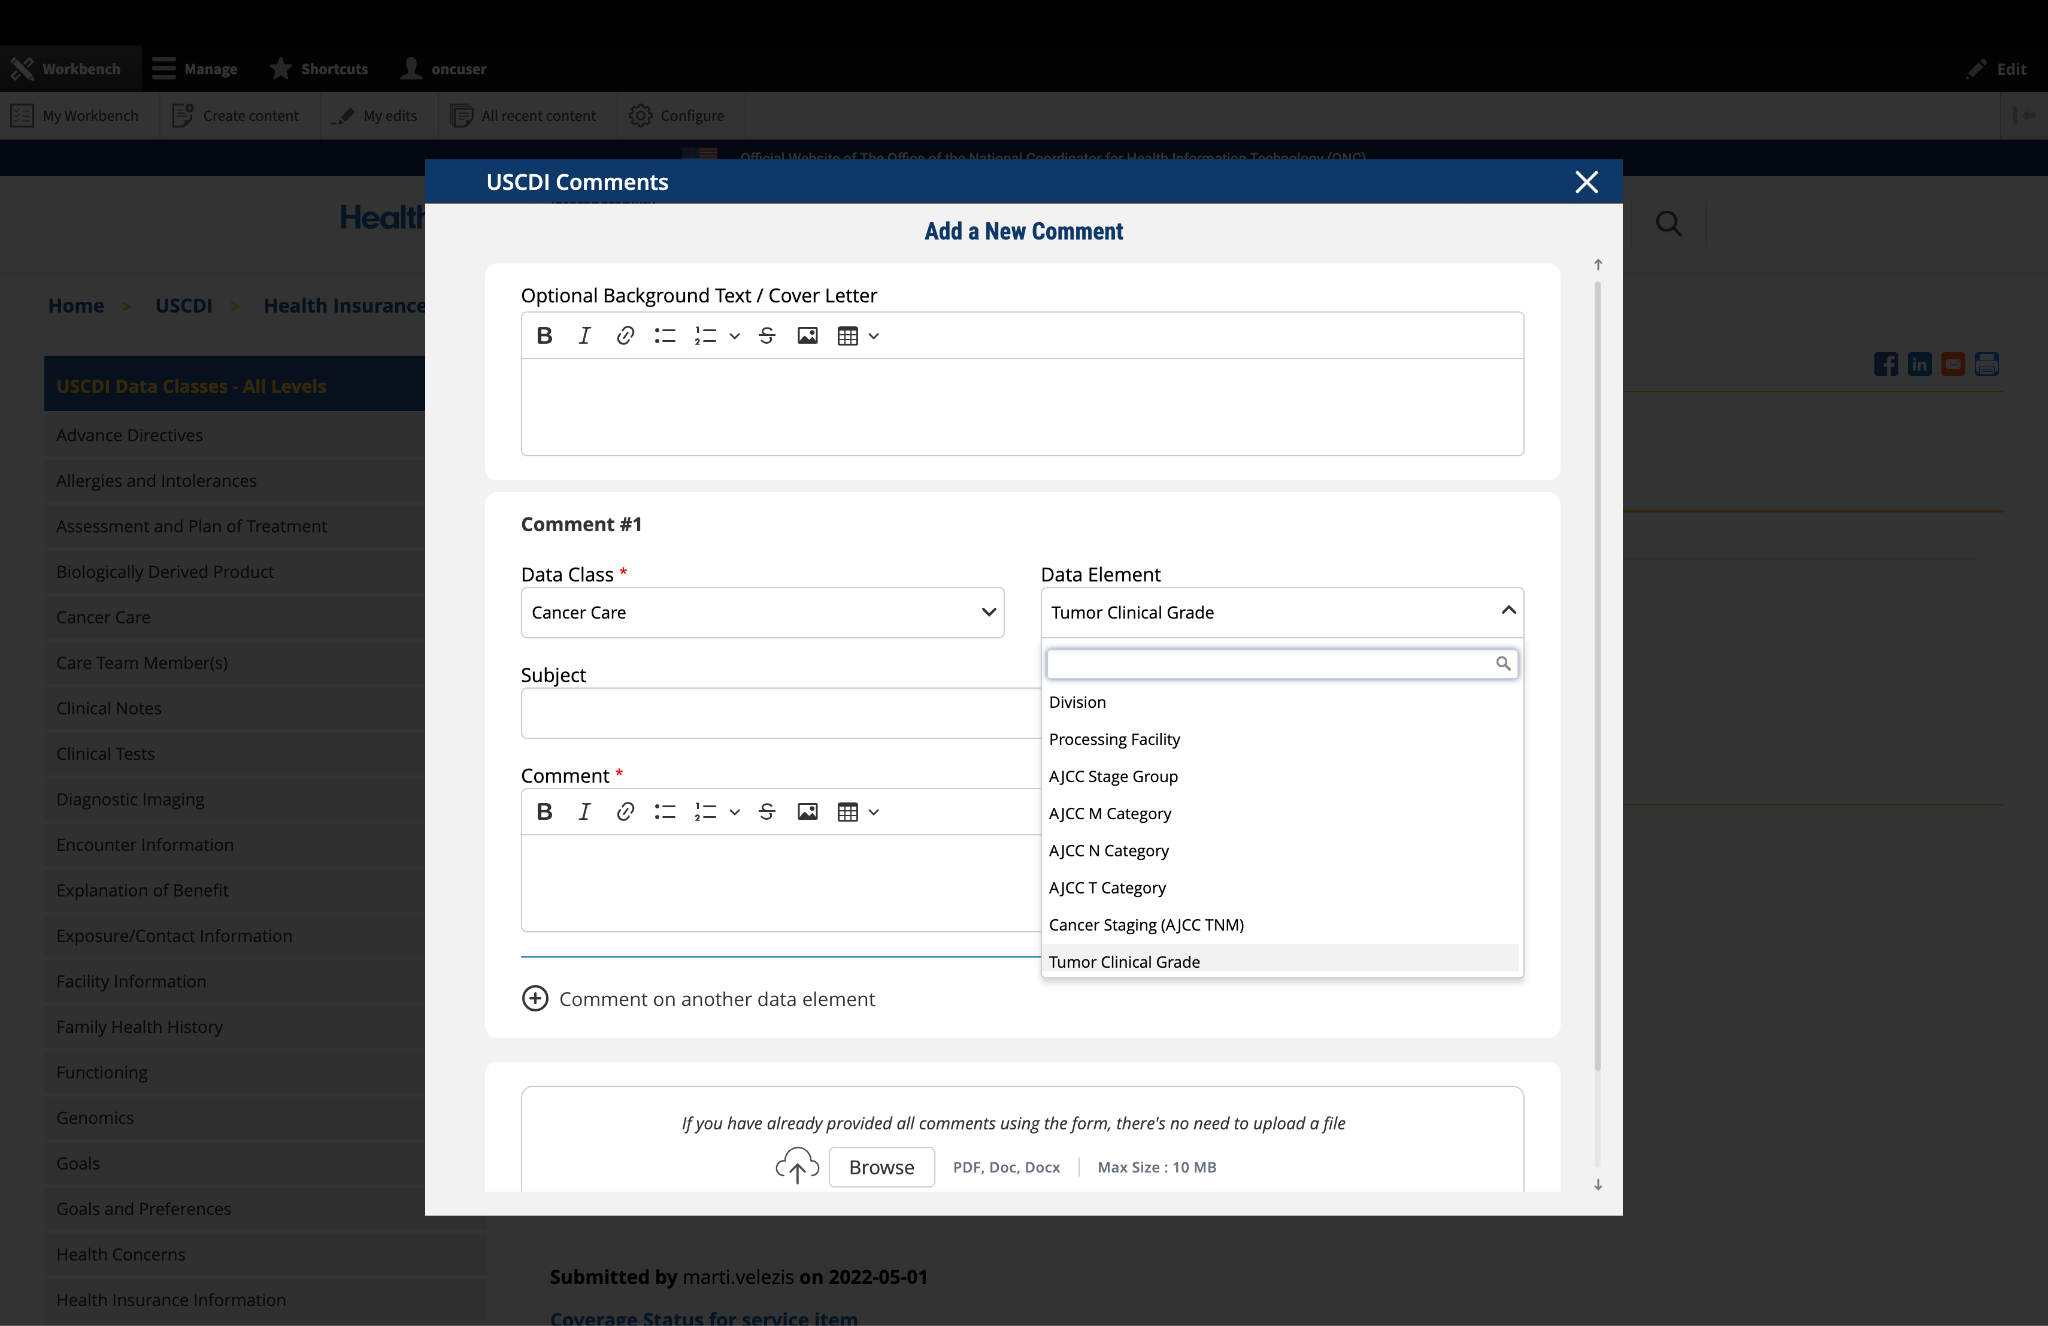
Fig 1 The "Data Class" and "Data Element" dropdown menus allow users to specify the exact content they wish to comment on.
4. Optional: Propose New Data Class or Element
If you cannot find the appropriate data class or element for your comment:
- Instead of clicking the "Comment On An Existing Data Class Or Element" button, click the adjacent button labeled "Propose a New Data Class or Data Element."
- This will redirect you to the ONDEC (ONC New Data Element and Class) Submission System.
- In the ONDEC system, follow the provided instructions to submit your proposal for a new data class or element.
- Once your proposal is submitted through ONDEC, it will be reviewed separately from the commenting process.
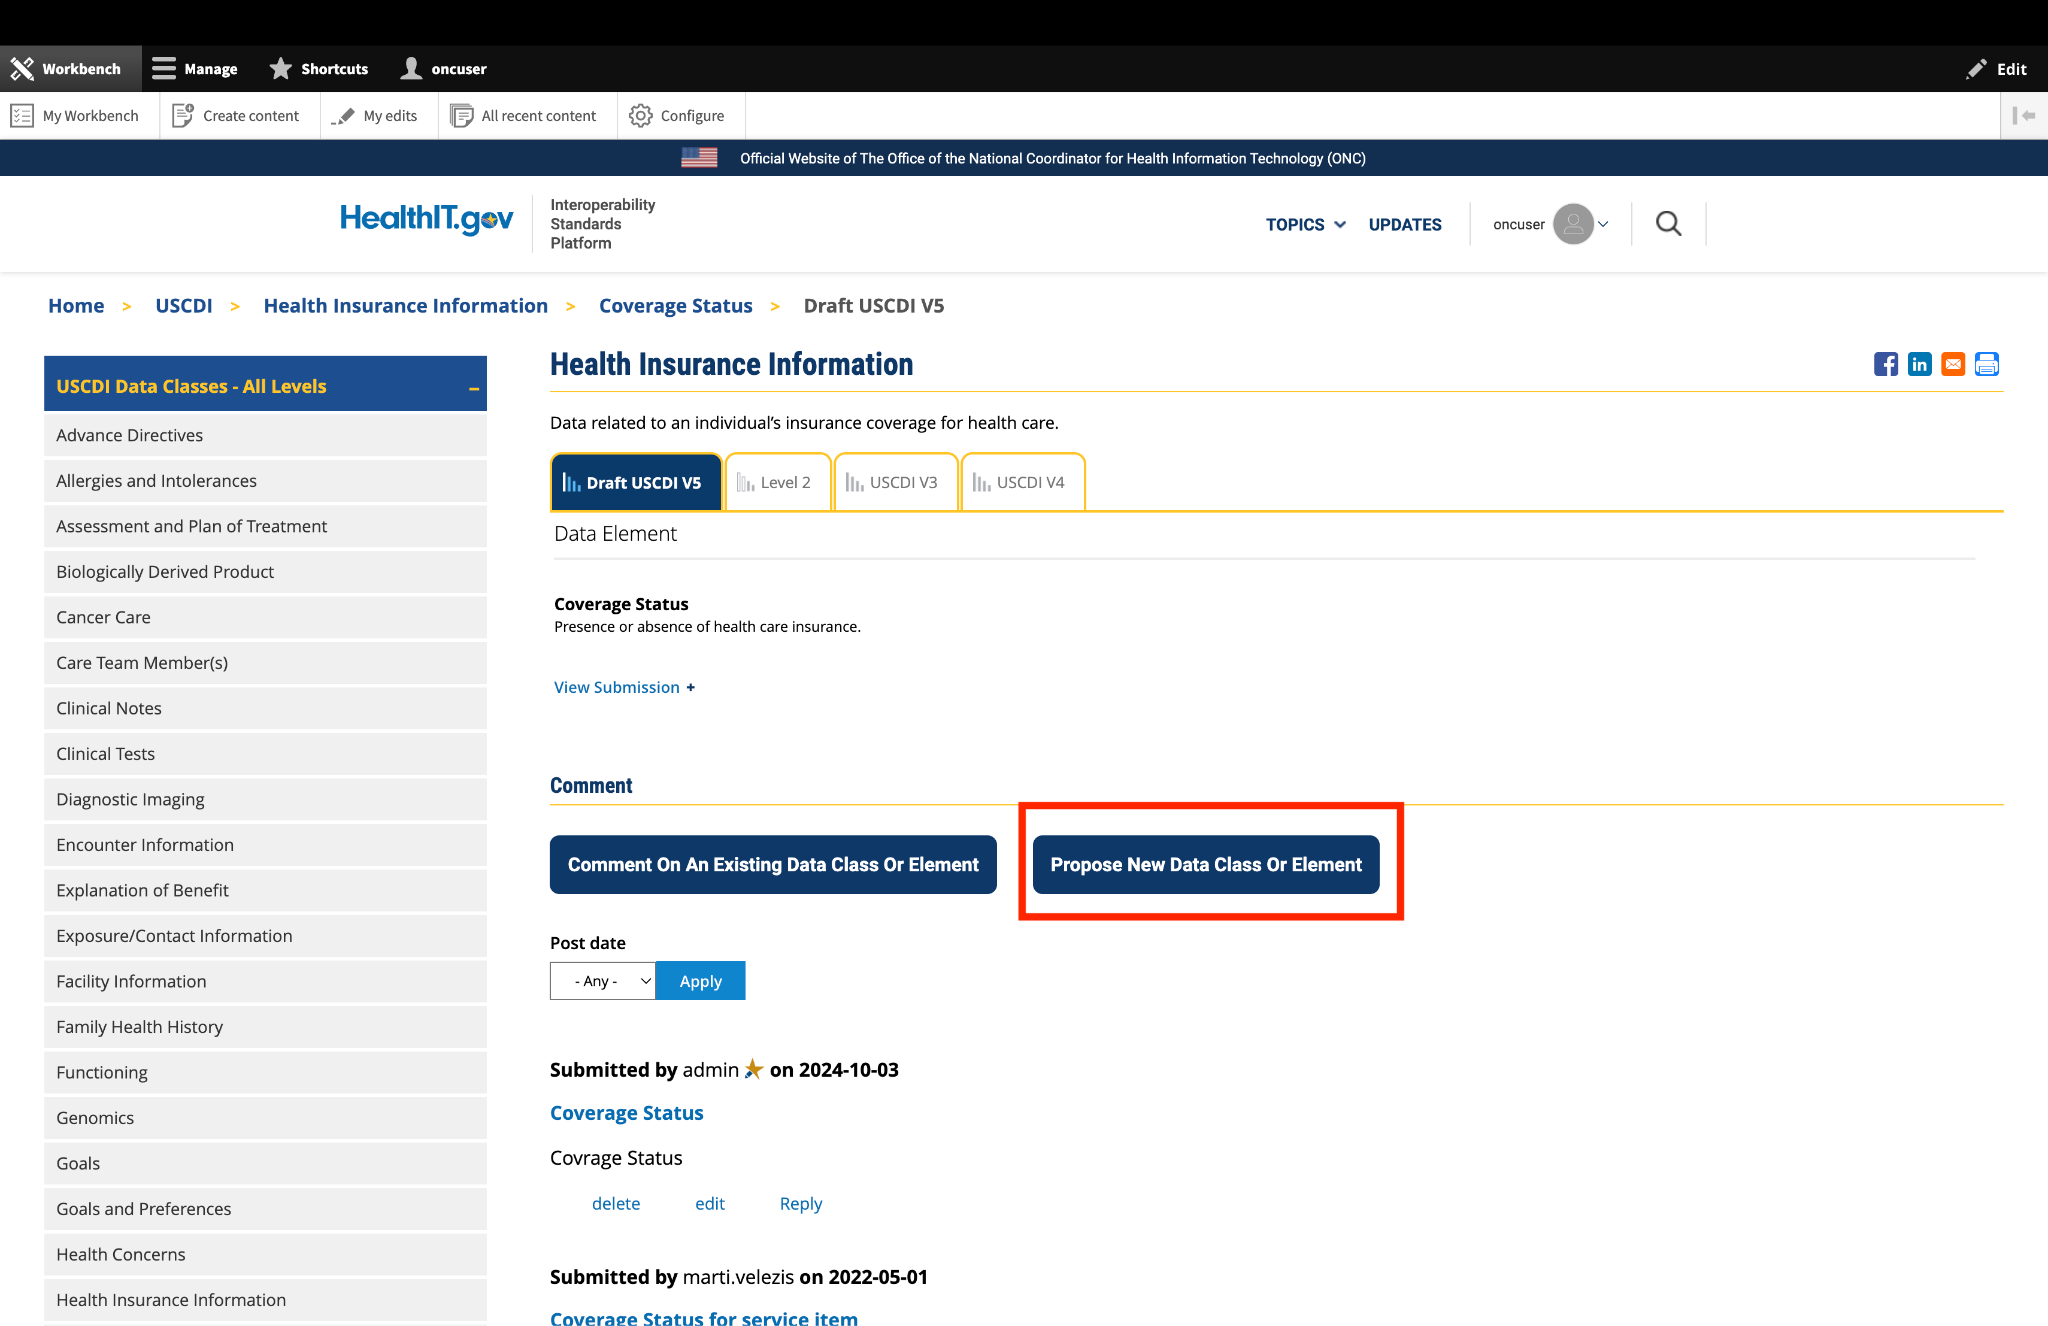
Fig 2 The "Propose a New Data Class or Data Element" button redirects users to the ONDEC Submission System for proposing new data elements not currently available in the system.
5. Complete the Comment Form
Fill out the required fields in the comment form:
Subject: Enter a brief, descriptive title that summarizes your comment. This helps reviewers quickly understand the nature of your feedback.
Comment: In this field, provide the full details of your comment or feedback. Be as clear and specific as possible about your suggestions, concerns, or observations. Include any relevant details that support your position.
6. Optional: Add Additional Comments
If you need to comment on multiple data classes or elements:
- After completing your first comment, click the link labeled "Comment on another data element" at the bottom of the form.
- A new comment section will appear, allowing you to enter details for your additional comment.
- For each additional comment, you must select the appropriate data class and data element from the drop-down menus.
- Complete the Subject and Comment fields for your additional comment.
- Repeat this process for each additional comment you wish to submit.
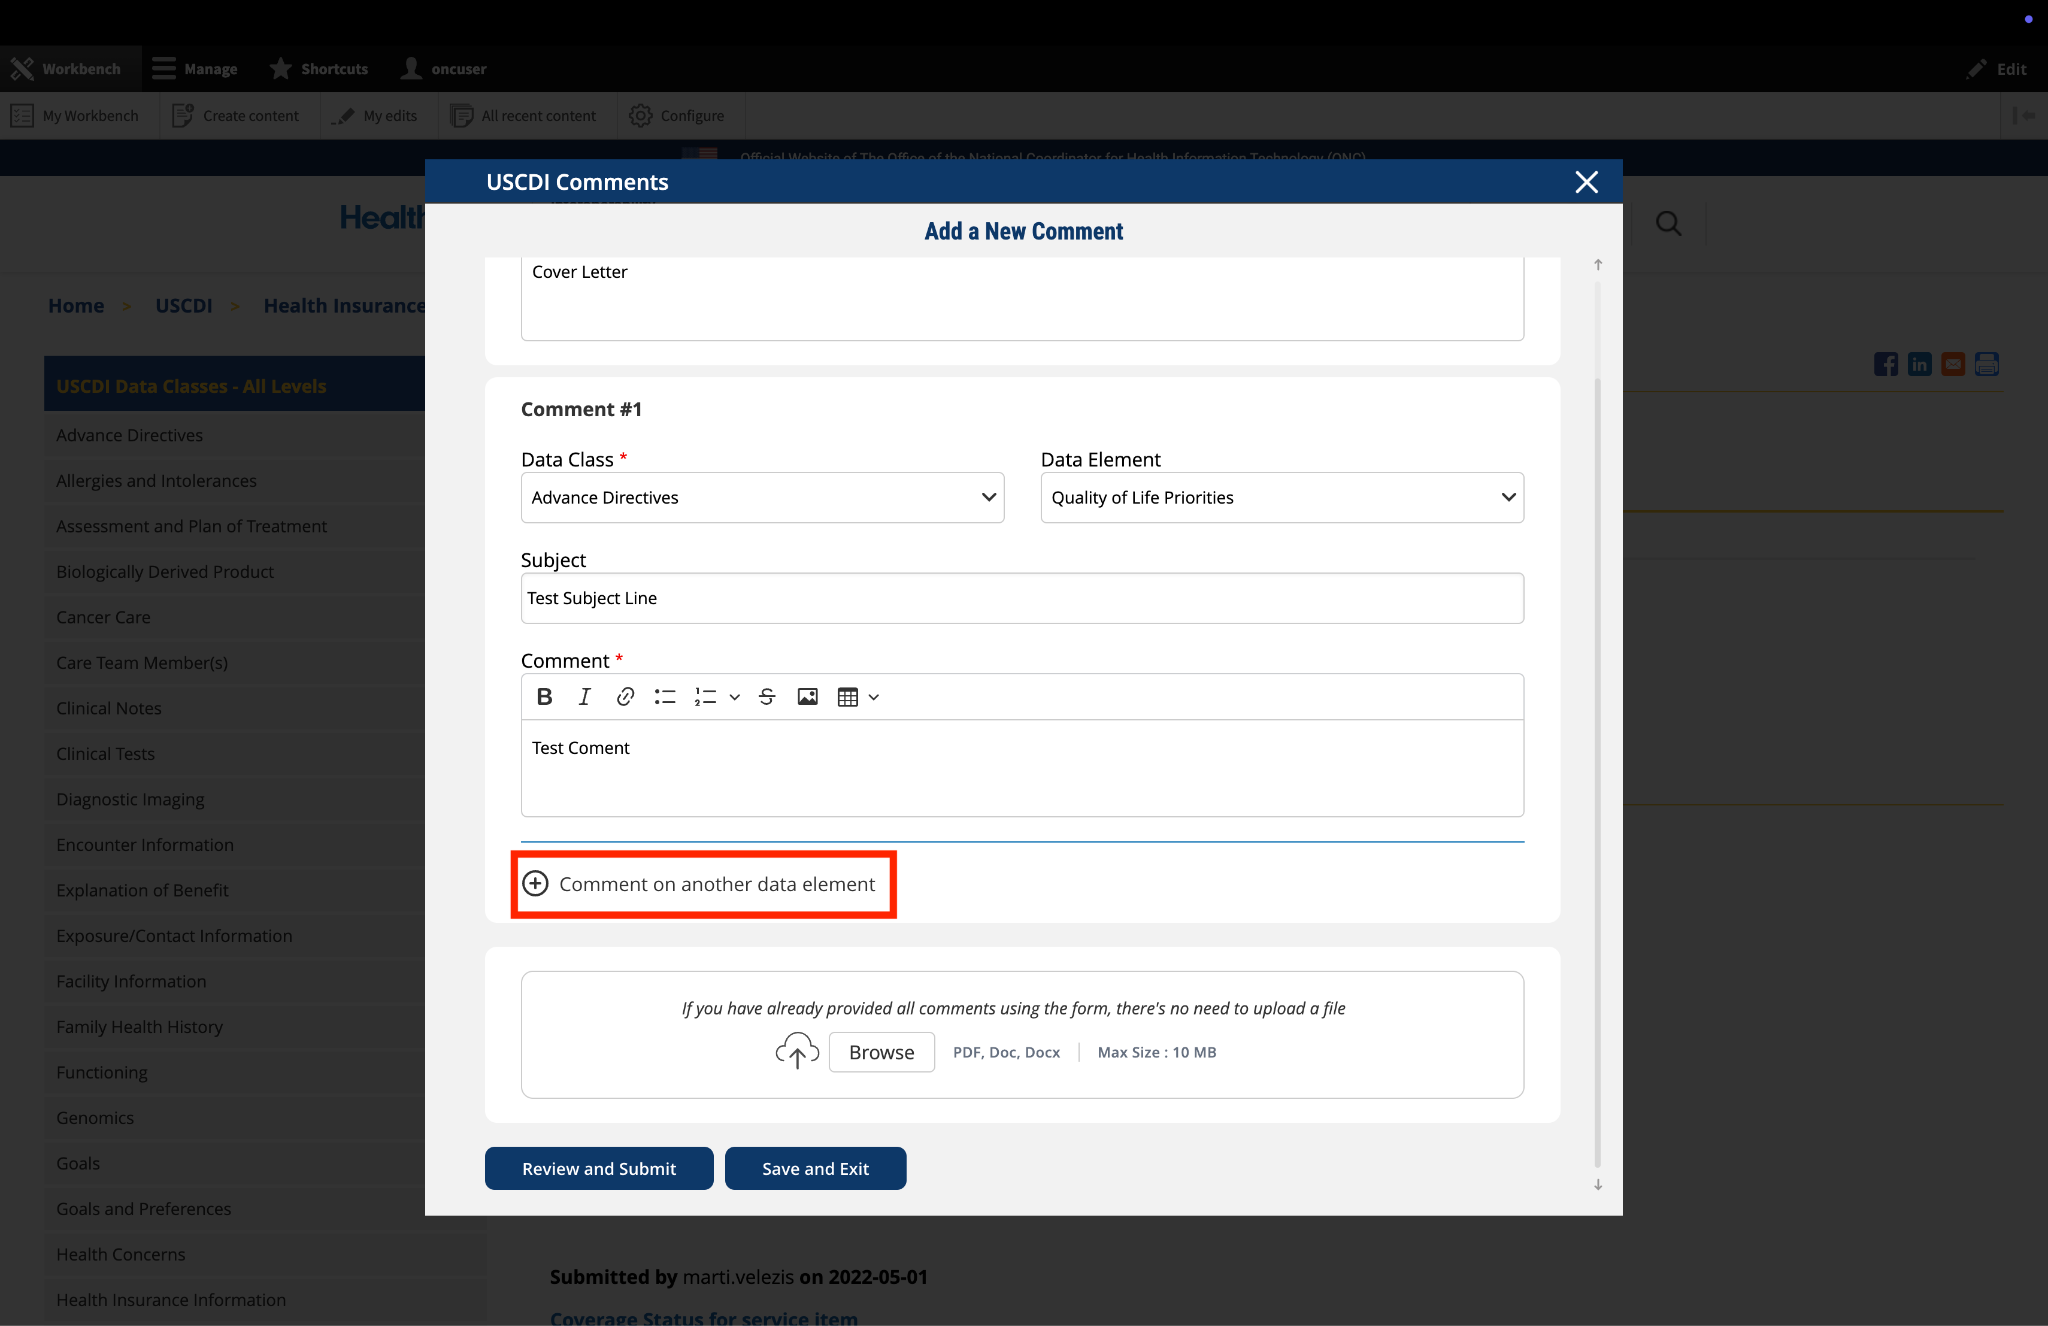
Fig 3 The "Comment on another data element" link enables users to create multiple comments addressing different elements within a single submission.
7. Optional: Upload Supporting Files
The platform allows you to upload supporting documentation to enhance your comment:
- Locate the "File Upload" section at the bottom of the comment form.
- Click to upload any files (such as PDFs or documents) that provide additional context, evidence, or clarification for your comment.
Important: If you have already entered your comments using the form fields, there is no need to upload duplicate content in PDF format. The file upload feature is intended for supplementary materials only. Please avoid uploading files that contain the same information already provided in your comment text.
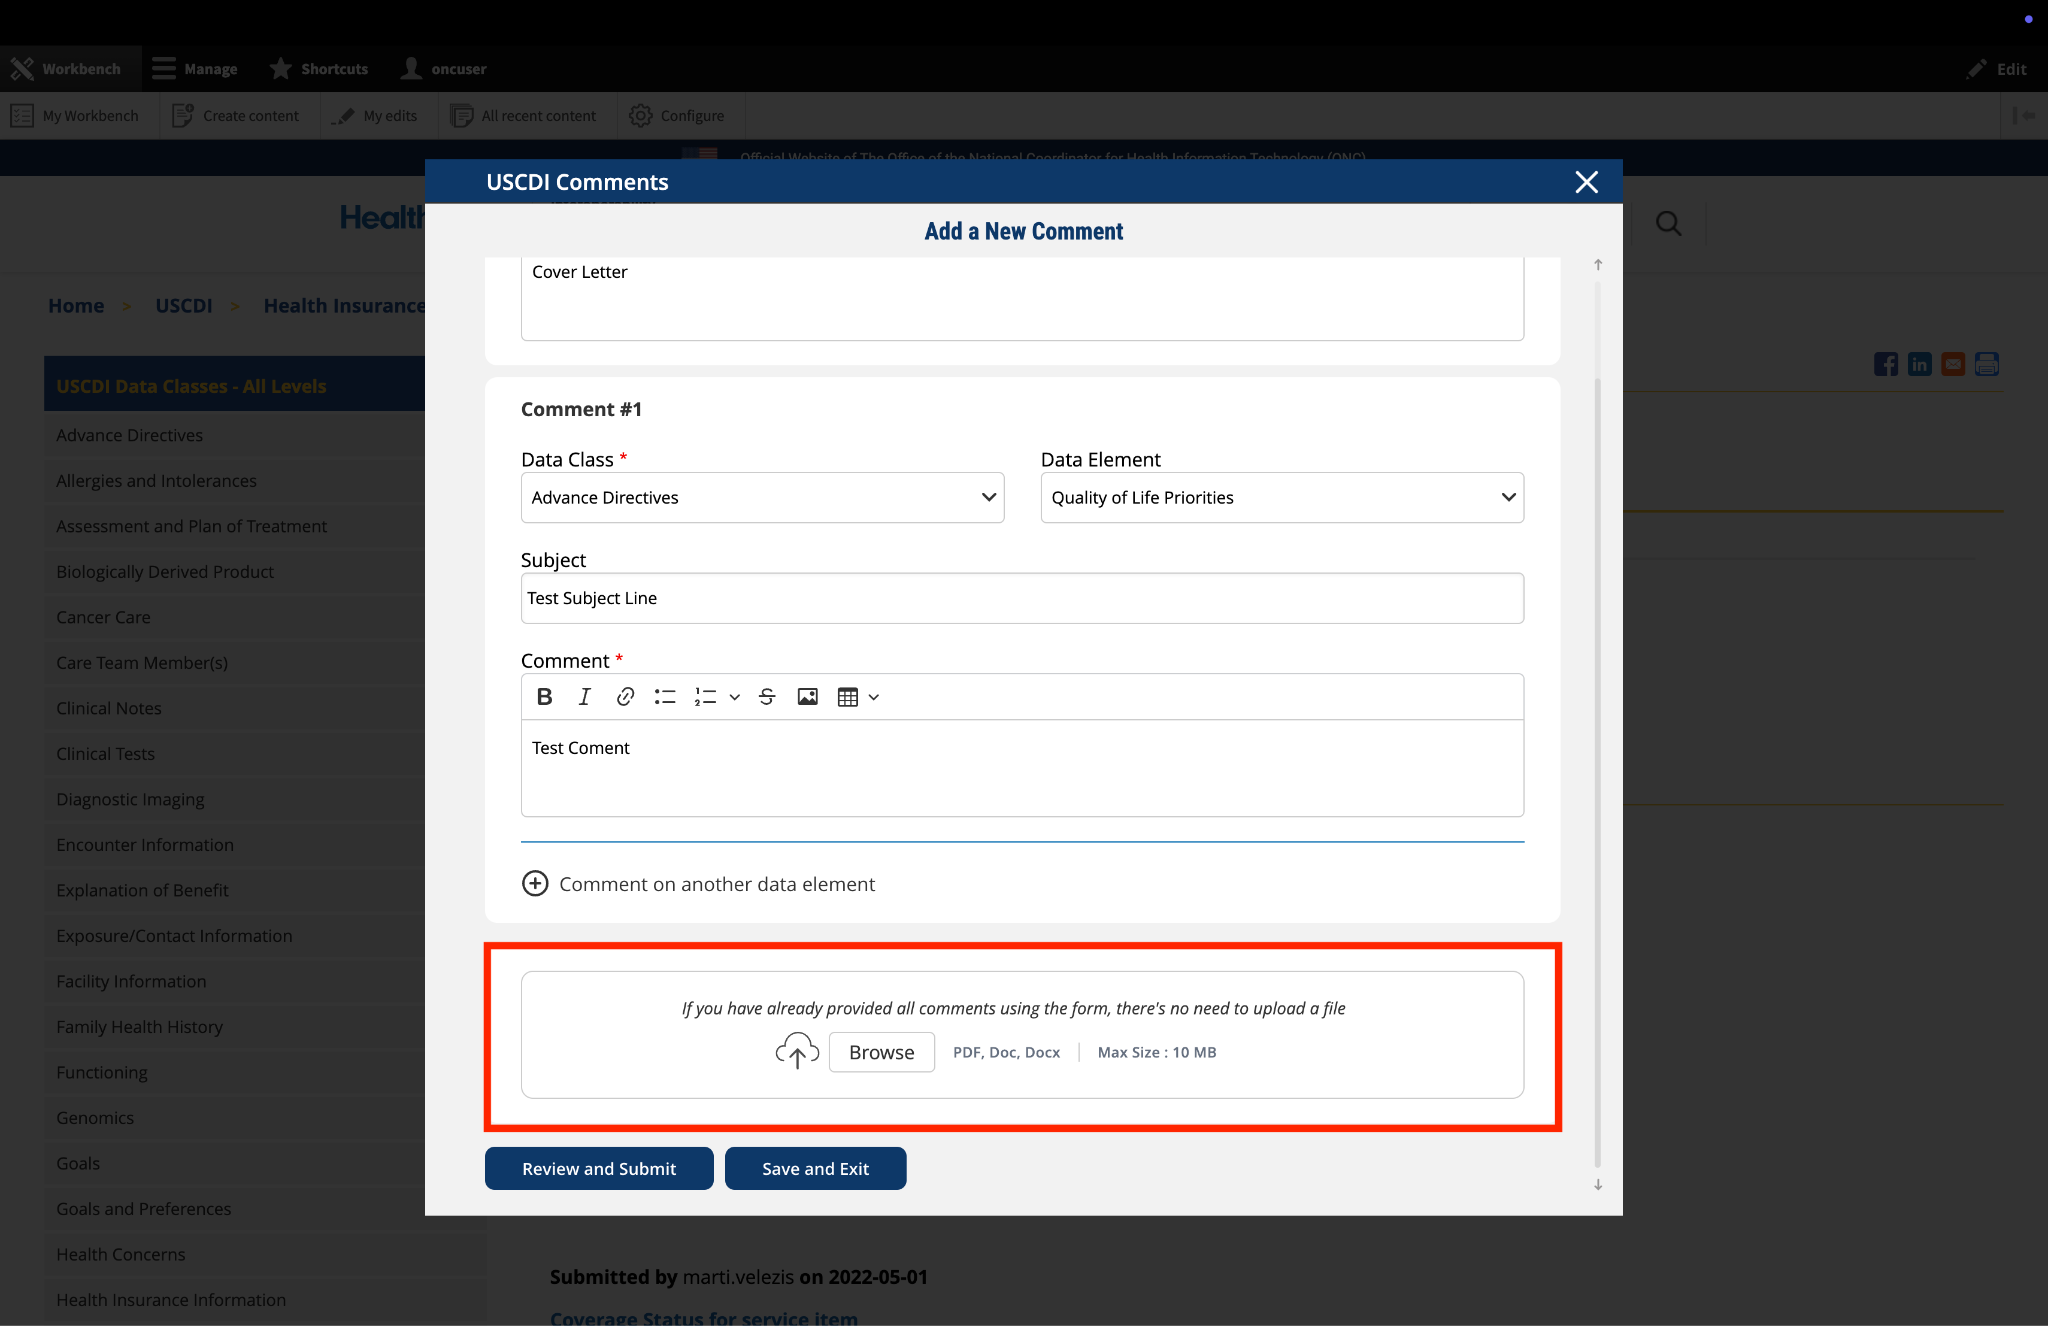
Fig 4 The "File Upload" section permits users to attach supporting documentation that supplements their written comments.
8. Optional: Save and Exit
If you need to pause your work and return to complete your comment later:
- Click the "Save and Exit" button at the bottom of the form.
- Your comment will be saved as a draft that you can access and complete later.
- When you return to the platform, you will see a red triangle with an exclamation mark next to the “Return to saved Comment” button, indicating that you have saved comments in draft status.
- Click this button to continue working on your draft.
- You will be taken to a review page where you can:
- Select "Submit Comment" to officially submit your feedback.
- Click "Edit" to return to the comment form and make changes
- Select "Discard Draft" to delete the saved draft and start fresh
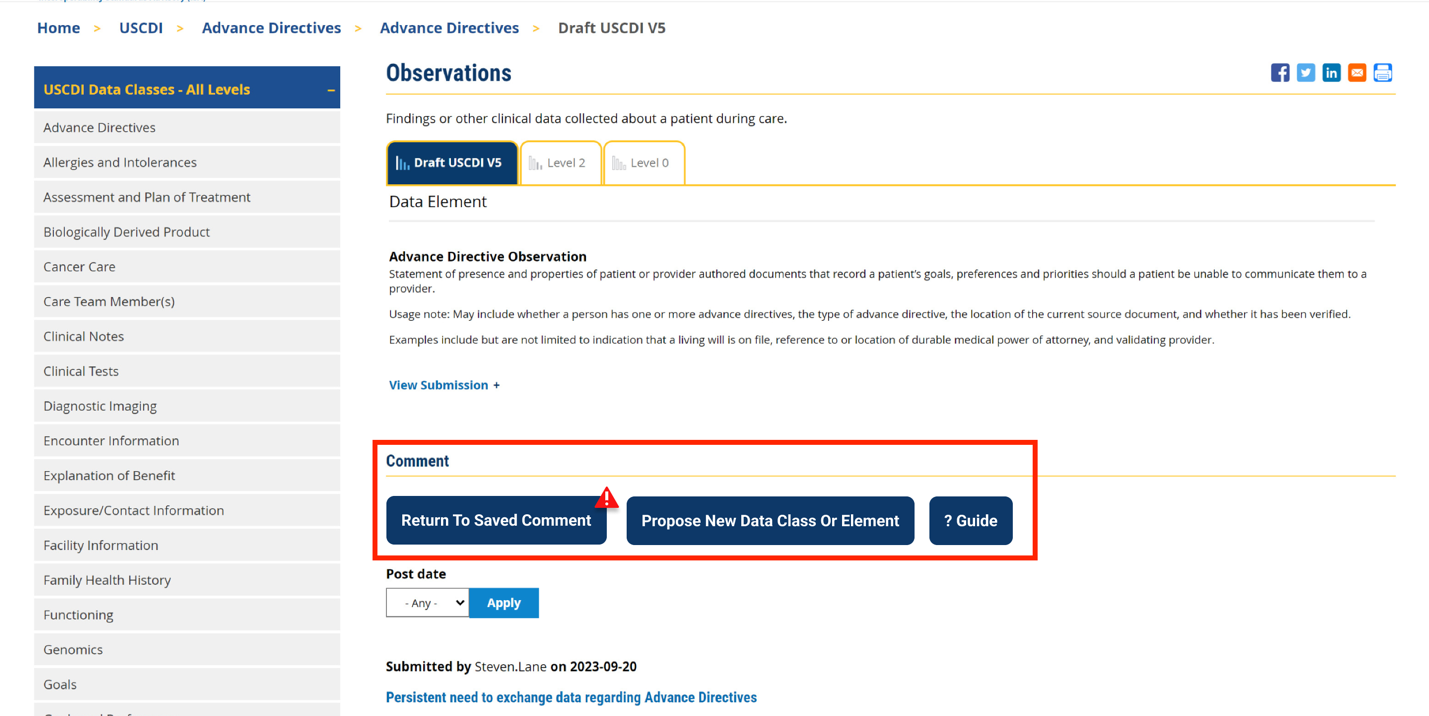
Fig 5 A red triangle with exclamation mark indicator appears next to the “Return to saved Comment” button when draft comments are saved in the system.
9. Review and Submit
Once you have completed your comment:
- Click the "Review and Submit" button at the bottom of the form.
- This will take you to a review screen displaying your comment(s) in full.
- Review all information for accuracy and completeness.
- On this review screen, you have three options:
- Click "Submit Comment" to officially submit your feedback
- Click "Edit" to return to the comment form and make changes
- Click "Discard Draft" to delete the comment and start fresh
- The review screen also includes a "Print" button that allows you to create a printed copy of your comments for your records.
- If you choose to submit, your comment will be recorded in the system and made available for review by the appropriate stakeholders.
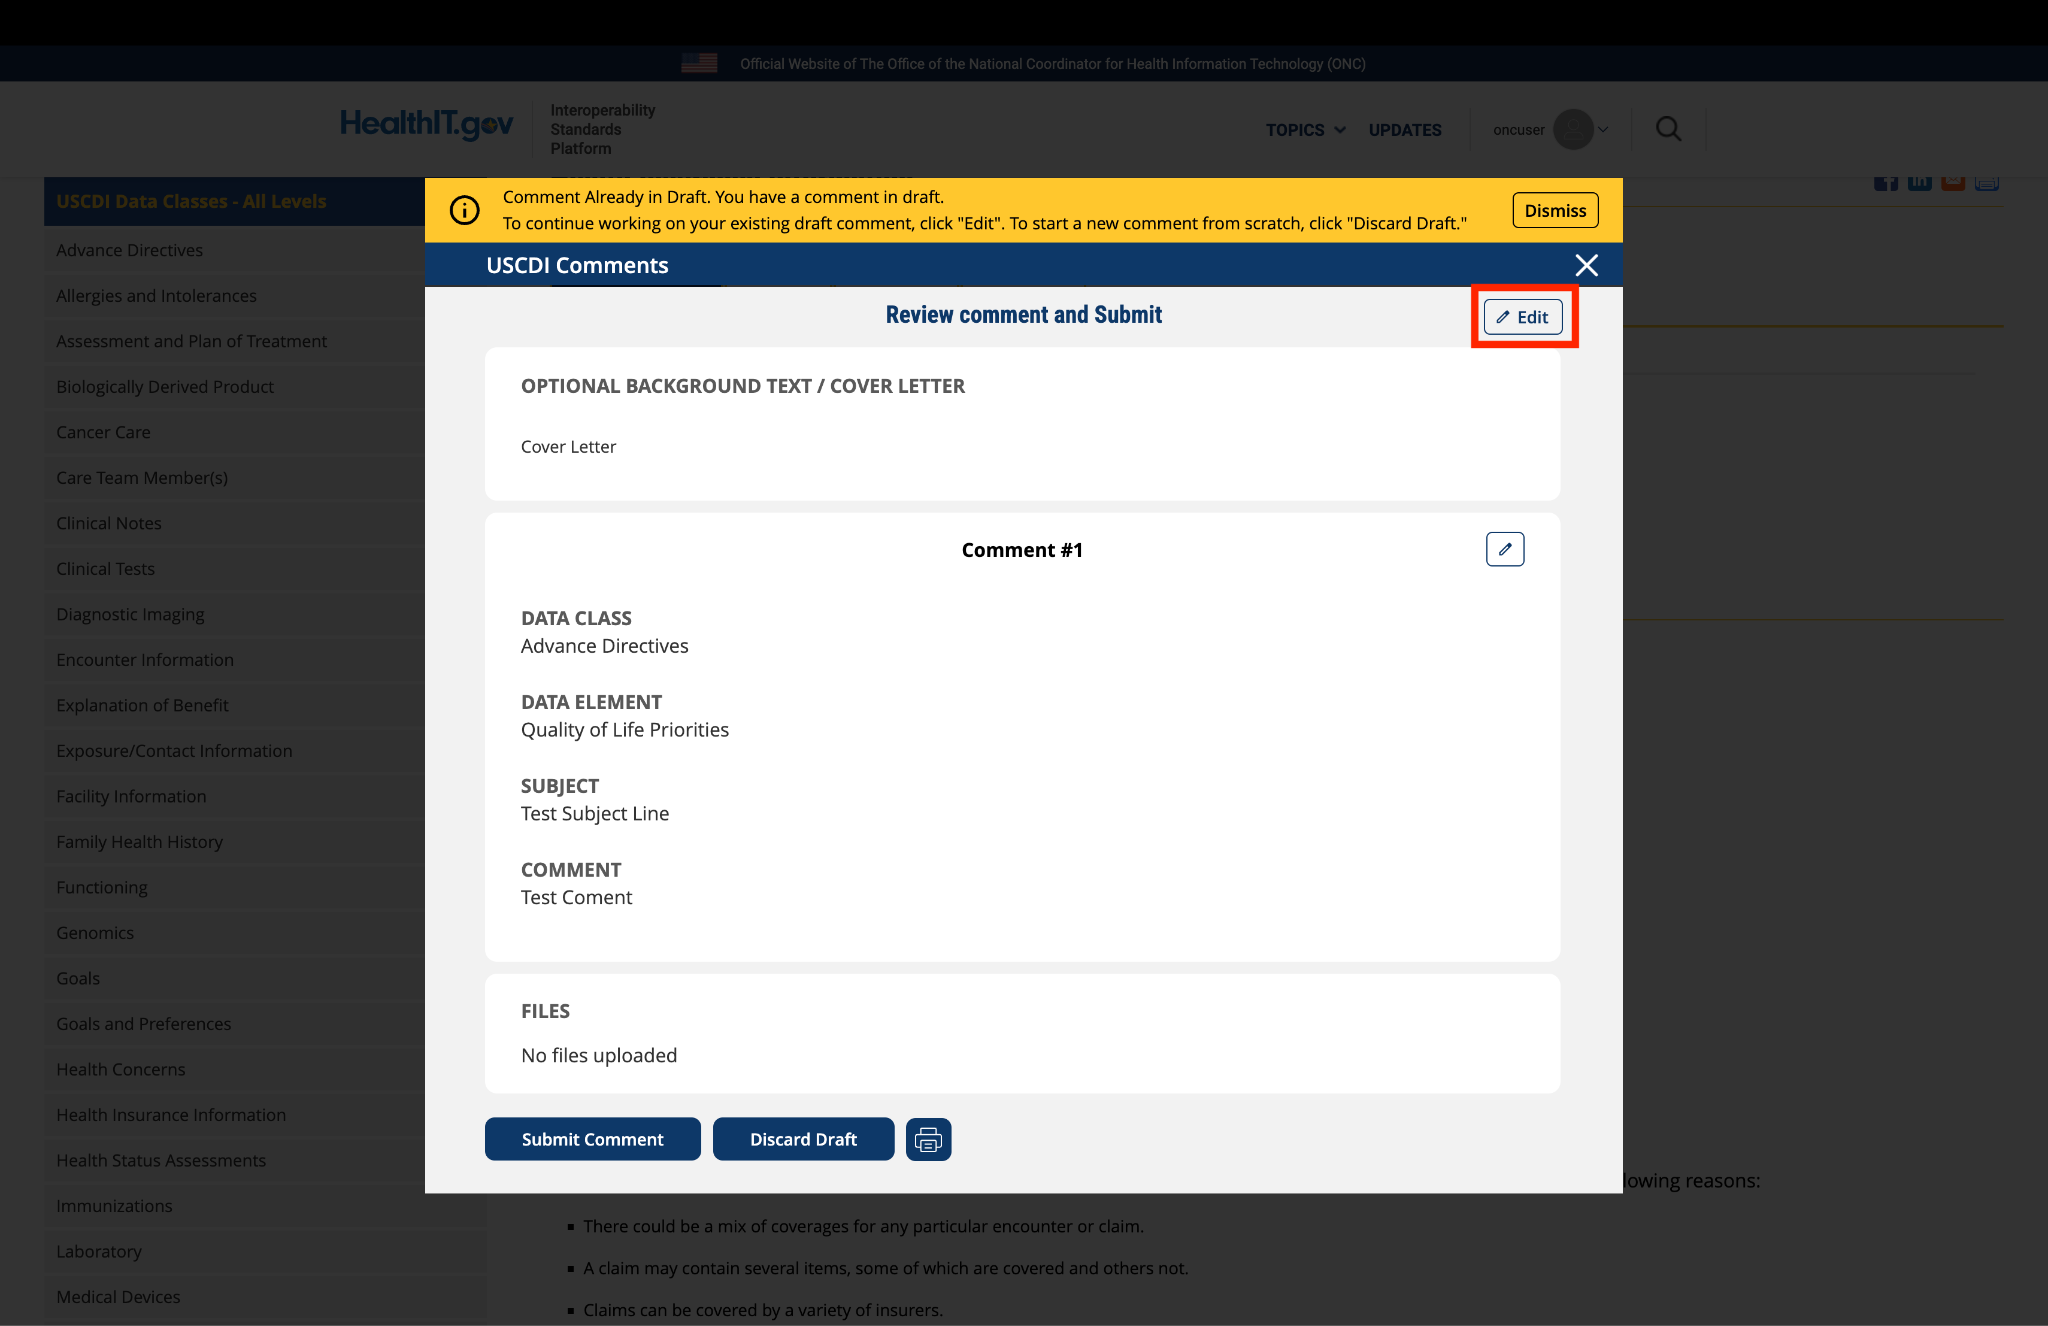
Fig 6 The review screen allows users to verify comment content and make any necessary modifications before final submission.
Submitted by Steven.Lane on
Recommended updates to Security Label data class